Allowing cranium surgeons at GOS hospital to more easily operate on patients by providing AR models for referencing and exploration during patient surgical planning
Currently, cranium surgeons have difficulty doing two things: (1) communicating clearly to patients the surgery they are going to undergo, and (2) viewing difficult-to-reach areas of the cranium during surgery. Thisl is a matter of simply providing visual reassurance for both the patient and surgeon
Paediatric DICOM (Digital Imaging and Communications in
Medicine) images can be processed into accurate Anatomical 3D models using medical software. This opens up opportunities, such as 3D printing, research and education, and surgical planning.
In July 2020 a Neuroradiologist at GOSH, took an interest in my work. He put me in contact with the 3D Print Engineer, Luke Smith and Craniofacial Surgeon, Dr Juling Ong at the hospital. They normally design, print and implant 3D facial prosthetics for peadiatric patients, but the team took an interest in combining AR with patient 3D Cranium images.
AR CraniumFacilitating communication through detailed renders
The final designs allow Surgeons to view and interact with the patient’s 3D Cranium during surgery, to use as reference. They would have the freedom of viewing and manipulating the size/rotation of the 3D model from all angles through a tablet device. They could also use AR to show patients/parents during appointments. They can visually present a better explanation of the surgury, which oringially was done through basic illustrations.
I realized quickly that the project would be ‘exploratory’ + hands on
Whilst there werent any defining targets to reach, the team wanted to get a better sense of how we could best incorpoartte AR into their workflow. This meant that they wanted me to get stuck in straight away with producing a 3D model of a patient’s skull – to which we would define mre granular steps moving forward.
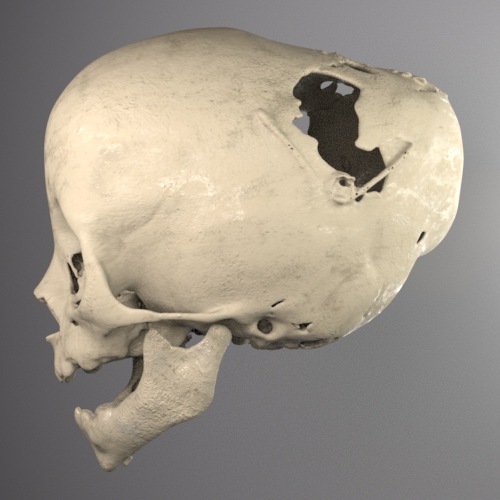
A patients Cranium CT images were chosen and placed into the software. Once the 3D model was produced, it was segmented by the Engineer into multiple parts. The file was then exported as an .STL file and handed over to me. I was able to examine the masterpiece that Materialise produced. To be able to explore and analyze the patients Radiology Images in my world of 3D, to see all the intricate detail, it was simply breathtaking.

3D CraniumGetting to work on the models in ZBrush
I was left with 3 high-poly meshes, consisting of 530,932k poly in total: Cranium (Face), Lower Mandible (lower jaw) & Steel Implants.
These were then exported as an .OBJ into Zbrush. My aim here was to reduce the polycount, whilst maintaining clean topology and detail. By using ZRemesher, I was able to create this effect, whilst making sure to retain detail/facial bone structure.
If the mesh became too low poly and lost it’s original look, I would counter this issue with Subdivision, adding more polygons. This became a bit of a balancing act until I was happy with the final result.

High Poly mesh in Maya
Reduced poly in ZBrushInjecting life with the power of colour
With the reduced-mesh back in Maya, it was ready for UV + Texturing. As I wanted to bring the grey-looking mesh to ‘life’, to give it some ‘colour’, Substance Painter was perfect for this. I was able to a reproduce realistic ‘bone’ texture. This was a vast improvement to what it looked like before, grey and plain. And to give the cranium some extra definition + realism, I applied a height, roughness and normal map to the bones surface.
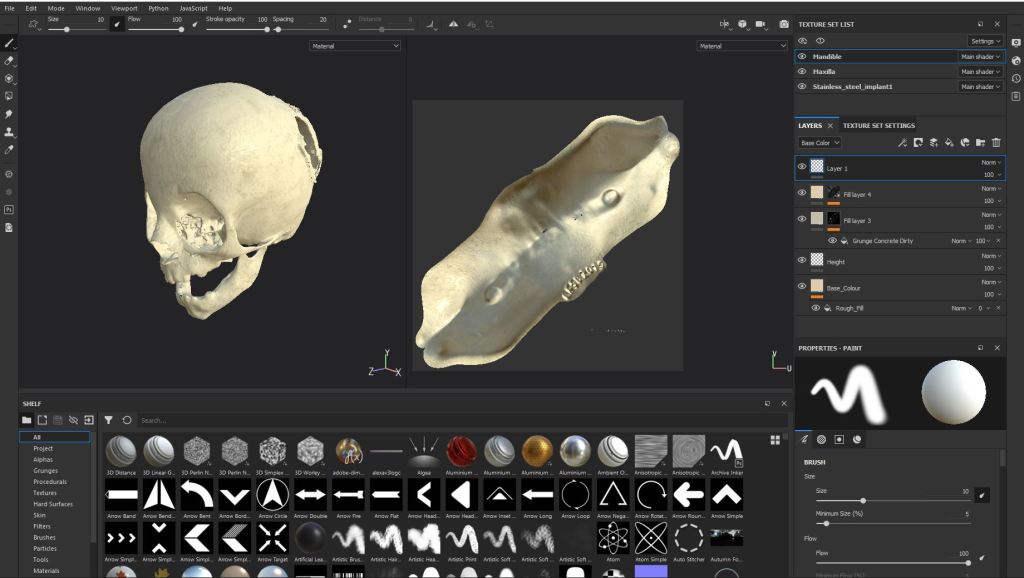
Substance Painter texturing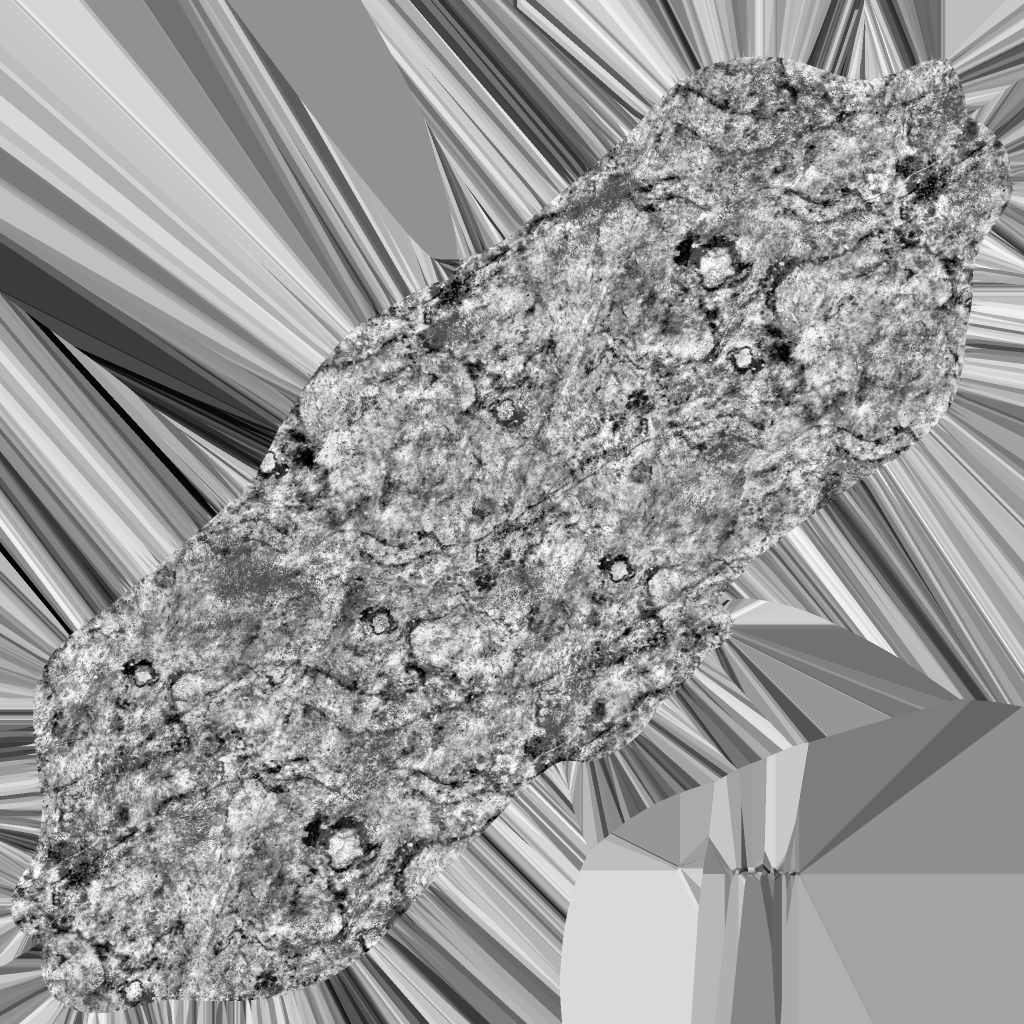


Mandible texture mapsThe textures were applied in Maya and a basic Rendering scene was set up, along with a 3-point-lighting system.
High quality renders were captured using Maya’s Arnold Render Plugin and this is where the textured Cranium showed it’s true colours. The team were also updated with the 3D Renders of the Textured Cranium. Upon being highly impressed with these, they were excited to see the development of the AR side next.
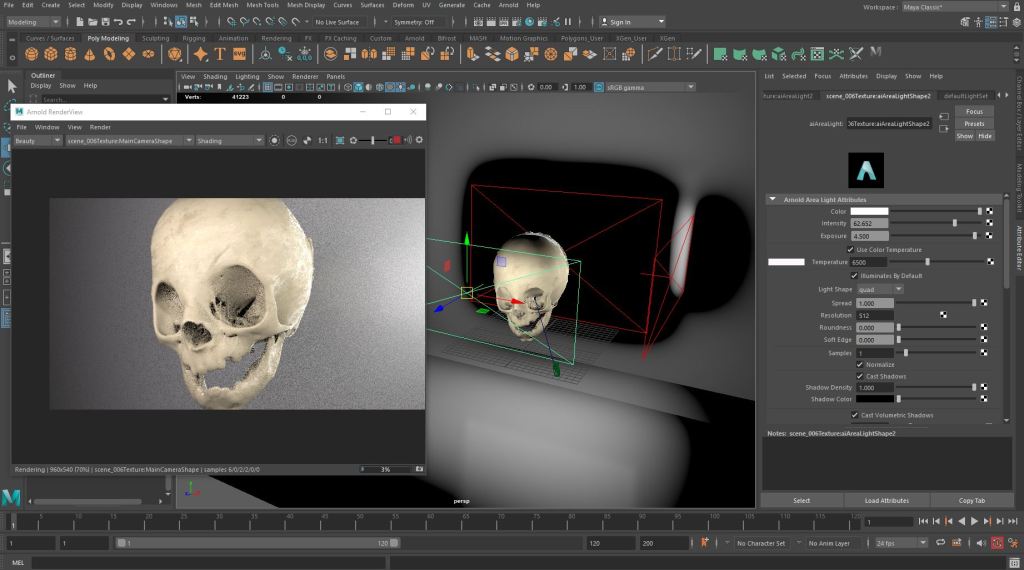
Arnold rendering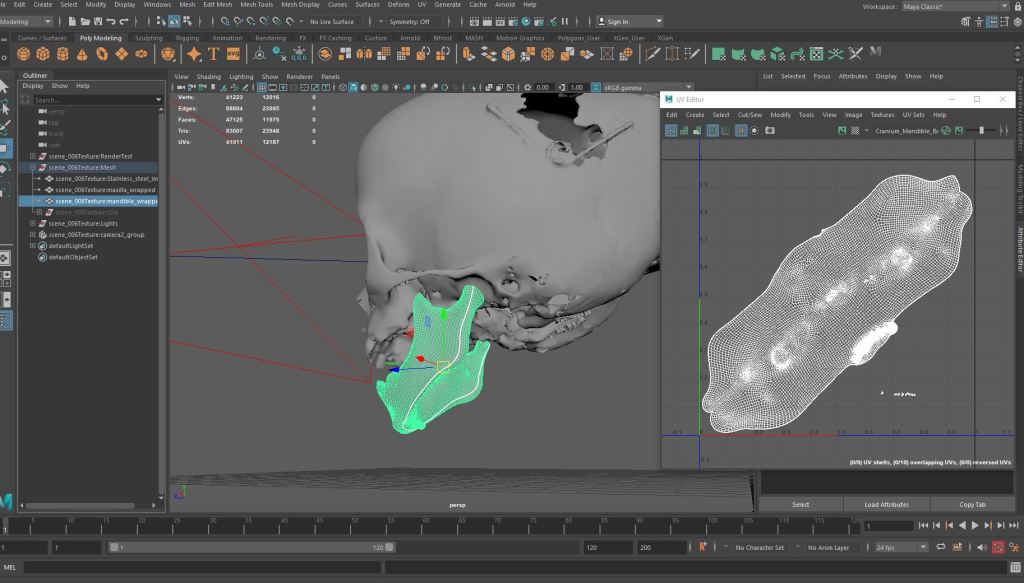
UV mappingThe AR experience had to follow strict hospital procedures
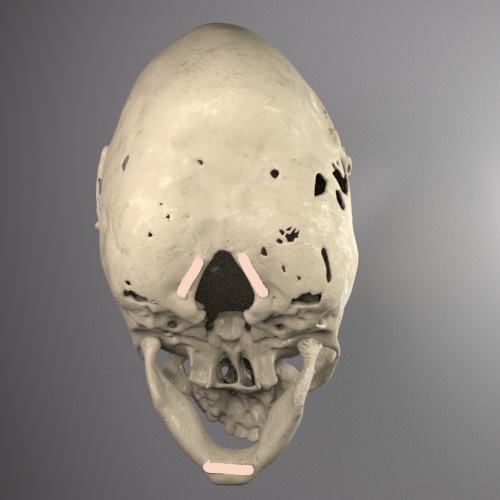
The 3D Engineer sent over some information/designs about the type of 3D prints he could create, so we could use as an Image Target. This was because as we were looking at using the AR Cranium in a surgical setting, what we printed needed to be sterilised in a protective coating, suitable for such an environment. After a few designs, we settled on the Pink Image Target, suitable both for the 3D printer and Vuforia tracking.
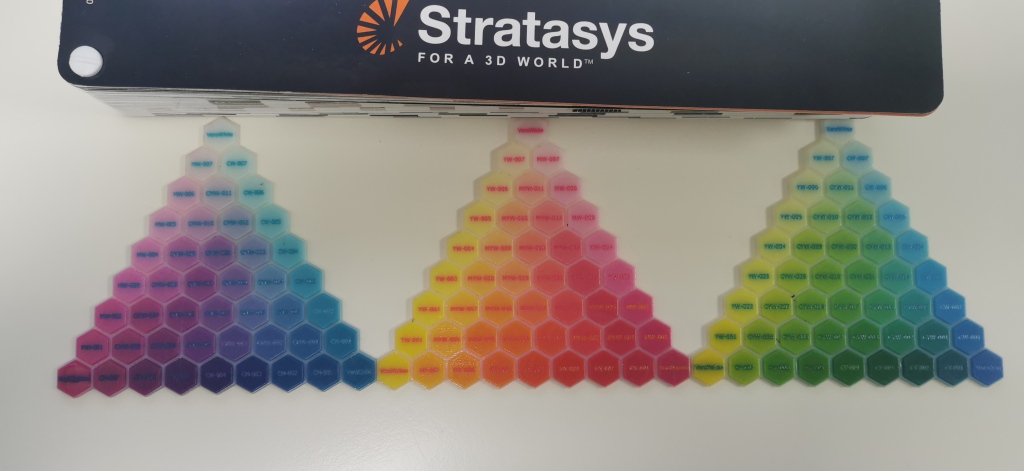
3D Print Technician colour chartDesign 1
Design 2
Final Design
The textured 3D Cranium and GOSH Image Target were setup in Unity with the Vuforia AR SDK. I applied the Lean Touch Input Management asset from the Unity Store, which allowed me to rotate and scale the 3D Model in AR via my smartphone. This gave the 3D Cranium a more hands on, immersive experience, which would allow both patients and surgeon to view the Anatomy from many angles.
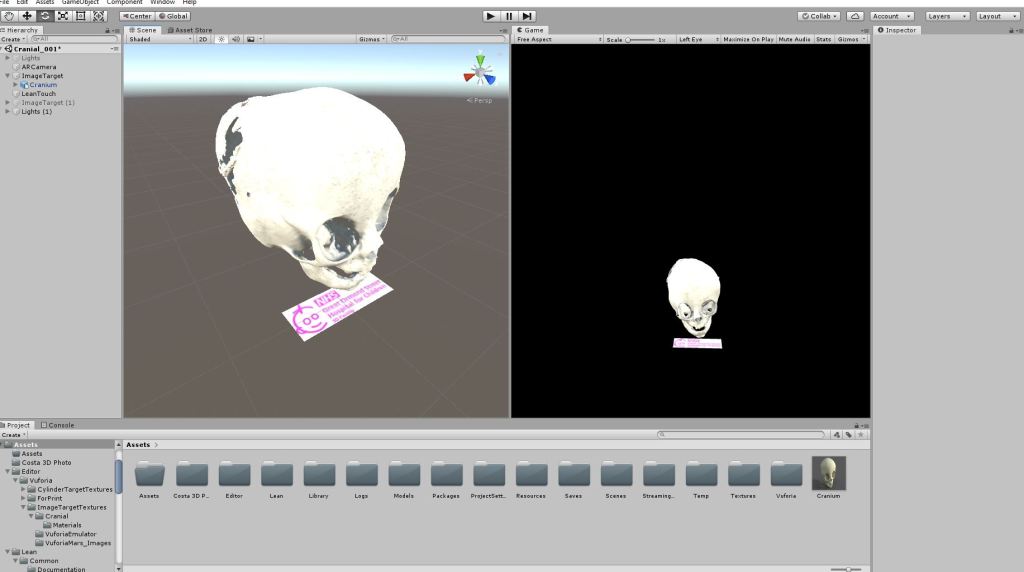
Unity projectAs the project went on, we realised we could use AR to project 3D prosthetics onto patients
Many patients are born without facial features/bone structure. Normally, specially designed 3D prosthetics are created for these patients. Sometimes the fit is not perfect and the prosthetics need adjusting and re-printing.
The Surgeon put forward an exciting idea of superimposing these 3D prosthetics onto the patient using AR and facial tracking.
The patients could try the fit of the AR prosthetic in the comfort of their own home, and also cut down on appointments to try it on in person. If the fit wasnt suitable, a re-adjustment in the software is that would be needed, until ready for final-design printing.
Unity AR face tracking sceneARFoundation Face Tracking testTesting the MVP in a practical setting
Unfortunately the Team were always very busy throughout the progression of this project. I would update them on a few occasions, with the Surgeon speaking of new ideas. This concluded possibly using the AR Cranium during surgery as a small trial, as well as inviting me to attend a procedure carried out by him. However with the Covid Backlog at GOSH, and me leaving the Hospital, there was no more contact from the team.

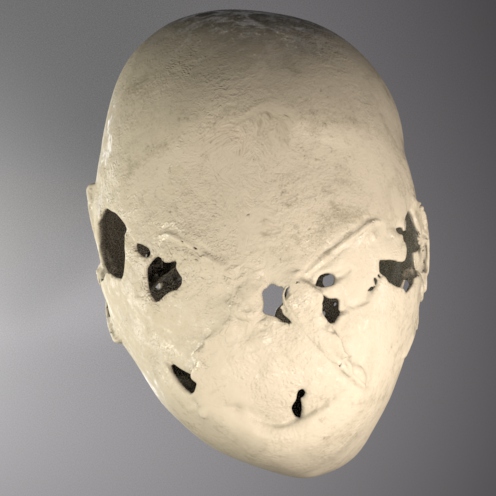
3D Cranium with applied textures, inside Arnold renderWhat I learned
Be decisive during stringent timelines
By working with a multidisciplinary team involved in important, time sensitive clinical work, you have to work to your own timeline.
Getting feedback on the project was not always an easy option, so any chance you could find in speaking to the Team was important. Asking the right questions, delivering precise updates on your progression etc.
Learning 3D print as a new skillset
I also had a chance to see and take part in the process of converting a DICOM image into a 3D print, something the 3D Print Engineer does daily. I was shown how patient images are converted into 3D files. I practiced segmenting patient anatomy using Mimics Materalise. As well as seeing the steps to produce 3D prints from high-tech machines.
Sharing skillsets creates engagement from stakeholders
By adding ‘colour‘ to a grey looking 3D DICOM mesh, you can bring the model to life. This was an exciting part of the project, as you saw more engagement and interest from the team with the textured AR Anatomy. Giving someone a new perspective, from your own skills, can lead to more discussion and enthusiasm for a project.
